

Hey pretties! Some exciting stuff has been afoot in the Lumbatis household these past few weeks – we’ve just completed our first ever kitchen renovation. Well, it wasn’t a true renovation but more of a makeover. We got our dark wood cabinets painted and replaced the backsplash and tile floor.
Today I’m going to share our before and after pictures of our kitchen (including links to everything) and some advice if you’re considering doing your own kitchen makeover.
We built our house ten years ago and I was involved in the process of selecting the original cabinets, flooring and backsplash. Back then, white kitchens weren’t as en vogue as they are now (but in all honesty, I think a white kitchen is classic and will never go out of style). Our house was originally built with dark wood and paint colors that fit my personality then but my tastes (and style) have evolved over the past decade. As we’ve done makeovers in every room downstairs, they have all become lighter and brighter. The kitchen was the last on the list, simply because we knew what an undertaking it would be!
And an undertaking it was…
If you’ve ever been displaced from your kitchen, you already know how inconvenient it is. For a week, we lived off pizza, take out and PB&J’s and washed dishes in the bathroom sink. Yes I realize how much of a first world problem this is and it gave me a keen appreciation for all that we take for granted every day!
Let’s start with the before photos. I didn’t really hate my kitchen before and it’s not that it was all that outdated, it just didn’t feel like “me”. Also with the makeovers happening in all of our other rooms, we didn’t have the flow I wanted in our downstairs which is important with an open floor plan. (excuse the mess on our counter tops, demo day was the next morning so we had started to clean everything out)
BEFORE PHOTOS


Tile and backsplash demo day was probably the worst day of the whole process. It was very loud and messy. In retrospect my one regret is that we didn’t have our tile guy put up plastic to contain the mess. Every square inch of our house was covered in a fine white dust after demo was completed. I’m still cleaning it up!

Fifteen big trash bags of broken tile, thank goodness it was bulk trash day!

We decided to spruce up our existing cabinets a bit by adding bead board paneling to the back of the island and an end panel. My husband Craig bought a sheet of bead board paneling for $20 at Lowe’s and our cabinet guys cut and installed it onto the existing cabinets. They finished it out with moulding on top and bottom.


After all repairs and caulking were completed on our existing cabinets, everything was taped off and the kitchen was wrapped in a plastic tent for painting day. The fumes were pretty overwhelming! If you have the option to stay somewhere other than your house during this part, I highly recommend it. We opened our doors and windows and decided to tough it out.

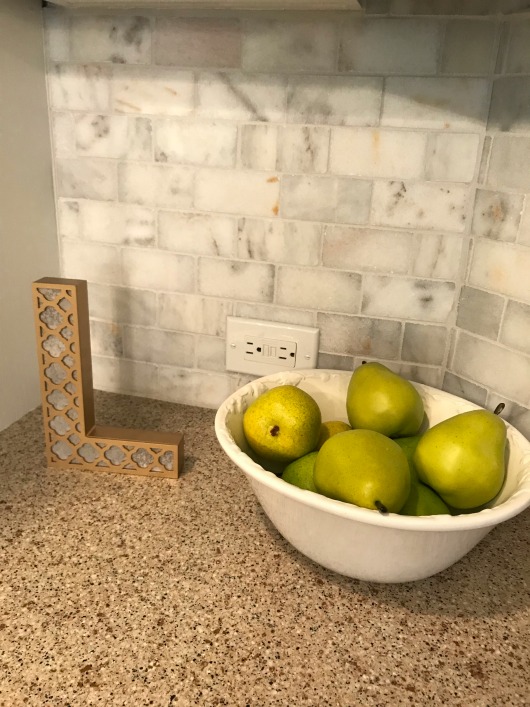
AFTER PHOTOS


The gray porcelain tile floor is probably my favorite change we made. I love how the light grout really makes the squares pop.


I especially love how the bead board detail turned out on the end of our cabinets and back of the island – $20 well spent!


The pendant lights over the island make such a pretty design on the ceiling.

Honestly my iPhone pictures don’t do it justice. This is the light, bright kitchen I’ve always dreamed of and so much more. The change is nothing short of drastic and I couldn’t be happier with the final result!


Here are links to our exact paint colors and items pictured:
CABINET COLOR: Snowbound – Sherwin-Williams
ISLAND COLOR: Dovetail – Sherwin-Williams
BACKSPLASH: Ocean Honed Marble Mosaic – Floor & Decor
FLOOR: Uptown Anthracite Porcelain Tile – Floor & Decor
PENDANT LIGHTS: Carmen 4-Light Pendant – Wayfair
KITCHEN TABLE: Beachcrest Home Tanner 7 Piece Dining Set – Wayfair
RUG: Mainstays Sheridan Ogee Area Rug – Walmart
TABLE RUNNER: Embroidered Table Runner – Amazon
DECORATIVE ITEMS: All from HomeGoods
Budget Friendly Kitchen Makeover Tips
- Painting your cabinets is a cost savings of tens of thousands of dollars over replacing them.
- Shop Wayfair for lighting and furniture. Delivery is free and their prices are better than most stores.
- Walmart has some great kitchen rugs with a rubber backing, they wash up nicely too.
- HomeGoods is perfect for accessories and replacing any kitchen tools you may need.
- Buy your own bead board and moulding to add detail to your cabinets. Have your contractor install them.
- Backsplashes don’t have to be expensive to look like it. Our marble backsplash was only $4.99 per square foot.
- Porcelain floor tile is relatively inexpensive and the larger sized tiles make a big impact.
Getting my pretty on with Style Elixir, Jo Lynne Shane, and A Little Bit of Everything.
I Feel Pretty Link Up
It’s the day of the week at GYPO where we celebrate what makes us feel pretty. Whether it’s a new outfit, hairstyle, or makeup, the I Feel Pretty link up is about anything and everything that makes your life prettier. Even if you’re not a blogger, you can still play along. Just tell me what made you feel pretty this week in the comments.


