

by Jennifer Hoffman of SBN Beauty
I can’t believe Thanksgiving is only ONE day away! It feels like Halloween was just yesterday. I don’t know about you, but I feel like the holidays just fly by quicker and quicker each year. Between buying gifts (and worrying about them not shipping in time), cooking, baking, preparing the house for guests, attending parties, and children’s programs, the LAST thing we often think about is how we’re going to wear our makeup for those picture-perfect holiday events. The only thing worse than feeling like you have nothing to wear is feeling like you don’t know how to wear your makeup and make it work for you! Makeup is my favorite accessory (yes it counts as an accessory) because there are SO many different ways to change up the look of your outfit with it, from everyday chic to full-on glam. Even the tones you wear can make a huge impact on your overall look. Let’s dive into three holiday makeup looks ANYONE can do, from makeup beginners to makeup mavens!
Look #1
The Cookie Exchange (Daytime Shimmer)
Let’s start with a casual daytime look. When attending a holiday event during the day, such as a cookie exchange – my personal favorite, you’ll want to keep your makeup more neutral but add a little something special. My favorite way to do this is with shimmer! I know what you’re thinking- “but can I wear shimmer if I’m over the age of 18?” I’m here to tell you that yes, you CAN. You just have to wear it in the right places on your face. My two favorite ways to do this are with eyeshadow & illuminator. Below are some steps to achieve a daytime shimmer look.
Step 1
Apply your routine daytime makeup look using foundation, blush, and neutral lip color that you love. A dewy bb cream or foundation is best for this look.
Step 2
Apply a basic midshade eyeshadow in your crease and a deeper shade in the outer V if you’re feeling fancy.

Step 3
Shimmer time! The easiest way to apply shimmer eyeshadow is with your finger! I apply it on the lid, brow bone, and inner corner of the eye. I like a darker shade on the lid and a lighter shade on the inner corner and brow bone, but it’s all preference! Below are some great shimmer eyeshadows plus what I’m wearing.
Tip: Apply a white base like NYX White Eyeshadow Base on the areas you are going to apply shimmer for a true-to-color look and to prevent fall out! You can also use a concealer as I show HERE!

Seint Eyeshadow in Glass Slipper / Seint Eyeshadow in #33

Tarte Sugar Rush™ Goals Goals Goals Eyeshadow Palette

Physicians Formula Extreme Shimmer Shadow Nude Palette

Step 4
Apply shimmer to the tops of cheekbones, cupid’s bow (right above the middle of your top lip), and the tip of the nose – anywhere you want a little extra glow. I recommend using a cream illuminator like Soft Focus Glow by Milani for this step or a cream shimmer eyeshadow. It works much better with any fine lines or wrinkles.
Tip: AVOID adding highlighter to crow’s feet and fine lines, or any areas you don’t want to draw attention to.

Wet n Wild MegaGlo Liquid Highlighter

Milani Soft Focus Glow Enhancer
Final HOliday Makeup Look
Here are some examples of how you can play with different shimmer colors for a variety of looks!


Look #2
The Holiday Cocktail Party
Dressy holiday parties in the evening usually require a little more oomph from your makeup. We always want our makeup to match the “fancy” level of our outfit to keep it streamlined. The easiest way to do this: wear a bold lip! No, it doesn’t have to be red but red is fun! The great part is, you can transition to this look from the daytime look I did above if you have two events in one day, especially since we didn’t go heavy on the eyes.
Tip: Pick ONE feature to go bold on so you don’t look like “a clown” as many women say.
Step 1
Put on your daytime shimmer makeup look detailed above.
Step 2
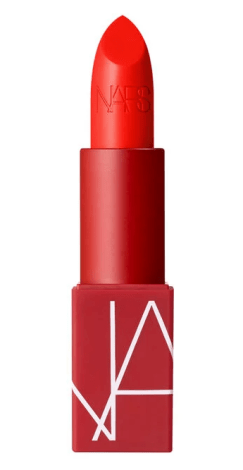
Add a bold lip! It can be red, berry, fuschia, whatever vibe you love that makes you feel beautiful!
Tip: To choose your perfect red, pick one with the OPPOSITE undertones of your lips (aka blue undertones choose an orange-based red).

shu uemura rouge unlimited lacquer shine
Step 3
Contour or line your lips. You can use a cream bronzer, cream contour, or lip pencil to do this. It will help keep your lip color on and keep it from going outside your lip line. You can do this before or after you add lip color – either way works! Here’s a tutorial showing you how to get a dimensional lip.
Tip: If you’re terrified of a bold lip, try a sheer gloss or balm. You’ll still get the difference in color to accessorize your look but without it being quite so bright.

NYC Slim Lip Pencil in Natural
Final Holiday makeup Look


look #3
Holiday Family Photos
The dreaded family photos. We all hate taking them, but we love the results so it’s worth spending a little extra time on this look. This is not the time to do your 5-minute makeup. Details matter when it comes to photo makeup. We’re going to use some tips from both looks for this, and when it comes to photo makeup: More is more. The camera washes everything out so we have to add that dimension back in ourselves. To get that picture-perfect look:
Tip: While you’re doing your makeup, check it in your phone camera instead of your mirror. This will show you how it will actually look in photos and if you need to add more or blend better.
1. Sunless Tanner
Start with a tan. A golden glow will really keep you from looking washed out in photos. My favorite facial tanner Coola’s Organic Sunless Tan Anti-Aging Face Serum is this one and for body and decolletage, I like Express Tan Water by Tanologist. This can be done a few nights before your pictures. However, if you aren’t familiar with using a sunless tanner I suggest doing a test run a week or so before to make sure you have the right shade. Sunless tanners last about 5-7 days so if you don’t like it, it will be gone before your photo.
2. Give Hair some volume
Give your hair some extra bounce! Hair also loses volume in photos. The Voloom Classic 1-1/2 Inch Professional Volumizing Hair Iron is the easiest way to achieve this!

Voloom Classic 1-1/2 Inch Professional Volumizing Hair Iron
3. Skip SPF
This goes against my typical skincare advice, but on picture day skip the SPF. It actually causes a flash in the photos. But for all intents and purposes, SPF should be a daily part of your skincare routine to protect your skin, just not on picture day.
4. add some Contour
You may not want to but you need some contouring in photos! This will help create dimension. Use a deeper shade for photos than you normally would or it won’t pick up. Check out my video on contouring HERE!
5. Next some blush
Just like adding layers to your outfit is great for adding dimension to your pictures, adding layers to your face adds dimension as well. So don’t skip the blush! Even a nude shade is fine. Blush will help add depth and dimension to your photos.
6. Give Yourself Some Color
If you used a sunless tanner as suggested in step one you may be tempted to skip this step but adding a touch of bronzer will help you avoid that washed-out look. And if you didn’t use a sunless tanner, this is an easy way to add a warm glow to your face. I prefer a cream but use whatever you have!
7. Shimmer Can Equal Shine
Go easy on the shimmers for this look. You can wear some, but too much may reflect light off of the flash of the camera.
8. Lashes
Thicken your lashline! This is one of the most important aspects of your photo makeup look. I like to use my L’Oreal Paris Voluminous Smoldering Eyeliner in Black to tight line my eyes and add depth, and then just add your favorite mascara! I use Superhero Elastic Stretch Volumizing & Lengthening Mascara by IT Cosmetics for mega volume. If you want some extra dimension, wear some false lashes. I suggest practicing with them a few times first if you’re not totally comfortable using them. I wear KISS Looks So Natural False Eyelashes and the glue I use is by House of Lashes.

KISS Looks So Natural False Eyelashes / House of Lashes.
9. Light Bright
Add a brighter concealer under your eye. This will give you a glow and add dimension.
10. Finally the lips
Contour or line your lips, especially if you’re wearing a nude lip, so they don’t get washed out (see step 3 from Look #2).
Final Holiday Makeup Look

With these looks and tips, you’ll be ready for any holiday event life throws at you this season! Remember- just like we look through our closet first with clothes, look through your makeup bag first and use what you have! You may be surprised! Happy holidays!
About Jen

I’m a wife and mom raising two energetic boys in the desert (ages 2 & 10!) I’m a licensed esthetician/makeup artist and I have worked in the beauty industry since I was a teenager. I love teaching women how to bring out the beauty they already have instead of covering it up. I believe beauty is for everyone and it’s my mission to not only help women look beautiful but believe they’re beautiful, too! Learn more at SBN Beauty or my Instagram!


