
Oct 20, 2017
By Cheryl Lynn Khyllep
I finally fit into those jeans. You know the ones I’m talking about. The ones that haven’t fit in years, but you just can’t seem to part with. They can be found squished in the back of the closet waiting for their moment to shine again. You had an amazing relationship with those jeans and the memory of how confident they once made you feel keeps you holding on. It was finally the moment of truth! I slowly pulled them on…and hallelujah, they zipped! But then I looked in the mirror and thought to myself, “this isn’t how I remember them fitting.” Where is my butt? Why is my tummy a little more, let us say, “fluffier” than I remember? Suddenly your jeans are not holding up their end of the deal anymore and you are left wondering, what happened?
The frustrating reality is that our bodies change. Over the past 15 years I have lost weight and gained weight, then lost it again. I have aged and had a child. In the midst of all that change, my body has changed as well. Things have rearranged themselves, changed shape and composition. If you are anything like me, in high school you studied those articles that divided bodies up by fruit or inanimate objects such as an apple or an hourglass. After figuring out what category you fall into, you learn all the styles that will fit and flatter your body type. Done and done! Now you can go on your merry way, confident that you now know what works and what doesn’t. But then it happens, your body has to go and change! Combine that with the constant evolution of styles and it can feel like a losing battle.
But now for the encouraging reality, you are still you and you are beautiful! Changes in our bodies come with a whole truckload of shame, and the cruel realization that we are aging. Here is the thing, beauty is subjective—it is based on opinion. Right!? So if beauty is subjective, and you combine that with the theory that you can’t make everyone happy, then trying to will always be an uphill struggle. So instead of exerting so much energy trying to make everyone else happy, why not focus on yourself? In other words, seeing ourselves as beautiful is our subjective choice, so why wouldn’t we choose to look at our bodies as beautiful?
For me, it helps me to think of the things my body has been through and the places it has taken me. The wrinkles around my eyes remind me of the laughter I shared with people I love. My fleshy stomach reminds me of the precious child it once held, and my callous worn feet remind me of the miles I have hiked and run. Think about all the amazing journeys your body has taken you, the places you have been, the accomplishments you have made, and the love and laughter it has felt. Your body will be with you for the amazing journey that is ahead, so you might as well treat it with respect and love.
Isn’t it time you choose to see yourself as beautiful? And shouldn’t your clothes be a tool to help you shine and not to hide from the world? Our clothes should be a reflection of how we feel about ourselves and not a cautelous for making us feel bad. But where to start? Below are the steps I took to help me and my clothes love my ever-evolving, beautiful self.
1. Shop Your Closet
You tell your husband you have nothing to wear but he looks at your closet full of clothes completely confused. That’s when you both realize, half your clothes do not fit. That feeling can be incredibly frustrating. Wouldn’t it be nice to look in your closet and know everything fits! To remedy this situation my suggestion is to take it all out. Yes, all of it! Then try on every single piece. You might be surprised by all the little gems that fit but were lost among everything that doesn’t. Then, if it does not fit or does not make you feel beautiful, I strongly encourage you to donate it. Why donate? Because by the time you fit in it again, the piece may be out of style or your body composition will have changed again. Case in point, my jeans from earlier. However, if you insist on keeping it, put it in a clear container close at hand so it does not go “out of sight, out of mind.”

2. Do Not Focus on Sizes
When going through your closet, whatever you do, do not look at the size on the tag. I say that for two reasons. First, we all know sizes are not necessarily true, what is a size 10 in one brand is a size 14 in another. Secondly, we can get stuck on numbers instead of focusing on the important questions at hand: Do I look good in this? Do I feel confident? Do not let the number on the tag determine what stays and what goes. Keep what makes you feel great and that you love seeing yourself in.
3. Do Not Make Assumptions When You Go Shopping
Most mothers have experienced that heart pumping moment when you are half naked in a dressing room and your toddler is wiggling out below the dressing room door. As moms and just busy women, it is hard to give ourselves the time and space to shop and fully process what we are trying on. While most of us would like to turn to online shopping, let’s be honest, that doesn’t necessarily provide the best fit. Go to the store. Try things on. Do not assume something won’t look great on you. Be open to different styles and again don’t be distracted by the number in the back. What is important is how you feel, confident and beautiful.
Shopping Tip: Who doesn’t love a good sale? But don’t overshadow good judgment and closet space buying something you don’t love just because it’s on sale. If you don’t love it, you will not wear it and no matter how much you saved, in the end, it’s money wasted.
4. Make Sure It Fits
When you are shopping think of Goldie Locks: not too big and not too small, just right. When I was heavier I was attracted to oversize clothing because I wanted to hide the body I was ashamed of. Now, looking back at pictures, that clothing choice did me no favors. Big clothing just made me look big. Clothing should give you shape. However, on the other side of the spectrum, clothing that is stretched to its natural limit or has buttons screaming for their life, do you no favors either. Your clothes should fit just right. Remember, Goldie Locks.
5. Belts are Your Friend
Climbing up on a soapbox I have to say, “Ahem, jeans and trousers should never be made without belt loops, like dresses should not be made without pockets…” Oh wait, no one cares. I will step down from my soapbox now. But really why would they make pants without belt loops? Belts are great. I used to avoid belts because I thought they were confining, but I was wrong. Not only will they hold up pants that might be loose, but they can give your body shape and add a fun detail to your outfit. They are great over long shirts and dresses. When you are tempted to wear the oversize clothing because you are self-conscience, you can still add shape with the addition of a belt.

Bonus: Tie it Up
I know! You are now having flashbacks of the eighties and you want to fight the idea of tying your shirt. Don’t fight it! Like the belt, tying your shirt or dress near your waist gives you shape, and shows off your beautiful body. Embrace the throwback.
Tip: Take a small hair tie or rubber band and gather up a small portion of the underside of your shirt and secure it. This will add a fun little detail to your shirt and also help pull it in to give you shape.

The struggle is real. Girlfriends, I encourage you on your battle to find clothes that make you feel confident. Do not settle! Remember you don’t need a lot, but you do need what fits. And I hope you always know, whatever your size, you are still you and you are beautiful!
About Cheryl
 Cheryl lives and works in rural South Dakota. She has a two and a half-year-old daughter that keeps her and her husband on the move. Being a busy working mom, Cheryl likes to keep her clothing styles simple and comfortable, but believes every woman needs a little pizzazz to remind them they are beautiful. She enjoys running, a new hobby that has helped her lose 50lbs over the past two years.

Oct 18, 2017
Hey pretties! Some exciting stuff has been afoot in the Lumbatis household these past few weeks – we’ve just completed our first ever kitchen renovation. Well, it wasn’t a true renovation but more of a makeover. We got our dark wood cabinets painted and replaced the backsplash and tile floor.
Today I’m going to share our before and after pictures of our kitchen (including links to everything) and some advice if you’re considering doing your own kitchen makeover.
We built our house ten years ago and I was involved in the process of selecting the original cabinets, flooring and backsplash. Back then, white kitchens weren’t as en vogue as they are now (but in all honesty, I think a white kitchen is classic and will never go out of style). Our house was originally built with dark wood and paint colors that fit my personality then but my tastes (and style) have evolved over the past decade. As we’ve done makeovers in every room downstairs, they have all become lighter and brighter. The kitchen was the last on the list, simply because we knew what an undertaking it would be!
And an undertaking it was…
If you’ve ever been displaced from your kitchen, you already know how inconvenient it is. For a week, we lived off pizza, take out and PB&J’s and washed dishes in the bathroom sink. Yes I realize how much of a first world problem this is and it gave me a keen appreciation for all that we take for granted every day!
Let’s start with the before photos. I didn’t really hate my kitchen before and it’s not that it was all that outdated, it just didn’t feel like “me”. Also with the makeovers happening in all of our other rooms, we didn’t have the flow I wanted in our downstairs which is important with an open floor plan. (excuse the mess on our counter tops, demo day was the next morning so we had started to clean everything out)
BEFORE PHOTOS


Tile and backsplash demo day was probably the worst day of the whole process. It was very loud and messy. In retrospect my one regret is that we didn’t have our tile guy put up plastic to contain the mess. Every square inch of our house was covered in a fine white dust after demo was completed. I’m still cleaning it up!

Fifteen big trash bags of broken tile, thank goodness it was bulk trash day!

We decided to spruce up our existing cabinets a bit by adding bead board paneling to the back of the island and an end panel. My husband Craig bought a sheet of bead board paneling for $20 at Lowe’s and our cabinet guys cut and installed it onto the existing cabinets. They finished it out with moulding on top and bottom.


After all repairs and caulking were completed on our existing cabinets, everything was taped off and the kitchen was wrapped in a plastic tent for painting day. The fumes were pretty overwhelming! If you have the option to stay somewhere other than your house during this part, I highly recommend it. We opened our doors and windows and decided to tough it out.

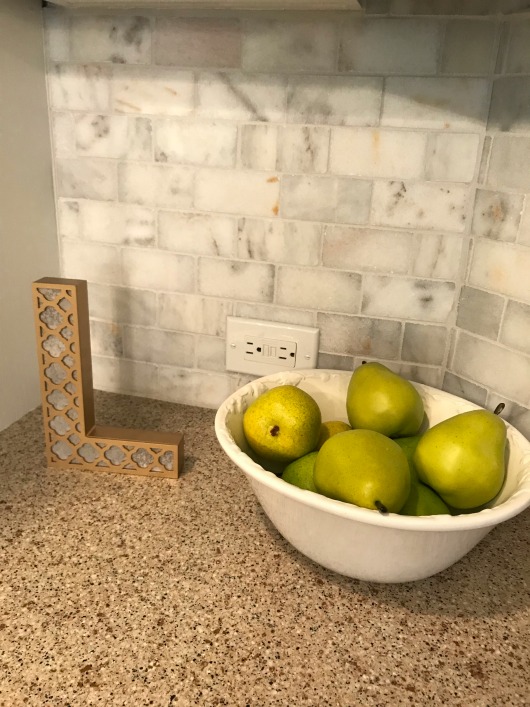
AFTER PHOTOS


The gray porcelain tile floor is probably my favorite change we made. I love how the light grout really makes the squares pop.


I especially love how the bead board detail turned out on the end of our cabinets and back of the island – $20 well spent!


The pendant lights over the island make such a pretty design on the ceiling.

Honestly my iPhone pictures don’t do it justice. This is the light, bright kitchen I’ve always dreamed of and so much more. The change is nothing short of drastic and I couldn’t be happier with the final result!


Here are links to our exact paint colors and items pictured:
CABINET COLOR: Snowbound – Sherwin-Williams
ISLAND COLOR: Dovetail – Sherwin-Williams
BACKSPLASH: Ocean Honed Marble Mosaic – Floor & Decor
FLOOR: Uptown Anthracite Porcelain Tile – Floor & Decor
PENDANT LIGHTS: Carmen 4-Light Pendant – Wayfair
KITCHEN TABLE: Beachcrest Home Tanner 7 Piece Dining Set – Wayfair
RUG: Mainstays Sheridan Ogee Area Rug – Walmart
TABLE RUNNER: Embroidered Table Runner – Amazon
DECORATIVE ITEMS: All from HomeGoods
Budget Friendly Kitchen Makeover Tips
- Painting your cabinets is a cost savings of tens of thousands of dollars over replacing them.
- Shop Wayfair for lighting and furniture. Delivery is free and their prices are better than most stores.
- Walmart has some great kitchen rugs with a rubber backing, they wash up nicely too.
- HomeGoods is perfect for accessories and replacing any kitchen tools you may need.
- Buy your own bead board and moulding to add detail to your cabinets. Have your contractor install them.
- Backsplashes don’t have to be expensive to look like it. Our marble backsplash was only $4.99 per square foot.
- Porcelain floor tile is relatively inexpensive and the larger sized tiles make a big impact.
Getting my pretty on with Style Elixir, Jo Lynne Shane, and A Little Bit of Everything.
I Feel Pretty Link Up
It’s the day of the week at GYPO where we celebrate what makes us feel pretty. Whether it’s a new outfit, hairstyle, or makeup, the I Feel Pretty link up is about anything and everything that makes your life prettier. Even if you’re not a blogger, you can still play along. Just tell me what made you feel pretty this week in the comments.
2. Link up your pretty post.
3. Link back to GYPO.
4. Visit other pretties.

Oct 16, 2017
By Jessica Pigza
Welcome to Favorite Finds – Glamour Edition – brought to you by an amazing date night with the hubby! It is not very often I have a reason to get really dressed up, but once a year, my husband and I attend the Air Force Ball in celebration of the birthday of the Air Force. I decided that since this was probably our last ball, I wanted to do it up right! I’ve only been to a handful in my husband’s career, and sadly, little effort had gone into my look. I had either just had a baby, or going was a last minute decision. Either way, I did not have the time or energy to go that extra mile.
Although I wanted to go out with a bang this year, I still did not want to spend a ton of money. Deciding what was important and what I could do myself was the first step in not breaking the bank. After thinking of all the elements for the evening: dress, hair, nails, shoes and makeup, I decided I wanted to put the bulk of my budget towards my dress. I wanted to treat myself since I had not bought a formal dress in years. We moved so much that I could get away with wearing the same dress year after year. No one in Texas knew I was wearing the same dress I had worn the previous year in Washington. This year though, I wanted something different for me. I decided everything else I could do myself. I watched hair and makeup tutorials on Pinterest and YouTube and I painted my own nails. While on this journey to pull off my glam look myself, I found a few products that are really amazing. Without further ado, I present my Favorite Finds – Glamour Edition!
1. Rent The Runway

I was hesitant to rent a dress but after using Rent the Runway, I am sold on this concept. It allowed me to wear a dress that normally would be way out of my price range and I did not have to sacrifice any closet space. The process was very easy and there were so many dresses and styles to choose from. Their filtering options made looking for a dress super easy, but it was the reviews that helped me make my final decision. I could filter the reviews for each dress by women who had a build similar to my own. I could then read their comments and see pictures of the reviewer in the actual dress. Did the dress run small? Was it tight in the bust? Was it forgiving around the waistline? The reviews also helped me to determine the size I would order, plus RTR lets you order a backup size at no extra cost. I finally decided on a navy blue sequin, one shoulder dress. As promised, it arrived two days before the event in a carefully folded garment bag. The dress looked just as pretty in person. After trying on both sizes, I picked the one that felt the best and enjoyed our evening out! I felt very glamorous and my husband thought I looked absolutely gorgeous. My confidence soared and I was on cloud nine that night. After the event was over, I simply put both dresses back in the bag, used the preprinted return label and dropped it off at the UPS Store the next business day. It could not have been easier!
Badgley Mischka Navy Constellation Gown

2. L’Oreal Paris Double Extend Mascara

Word of mouth is still one of the best ways to find out about new products and that is exactly how I found L’Oreal Paris Double Extend Mascara. I couldn’t help but notice my friend’s eyelashes always looked insanely good. It didn’t matter what time of day I saw her, her eyes always looked fresh! Finally, I asked her what she used and she told me about this amazing product. It’s a two-step mascara. The first step conditions lashes while the second step creates a tube-like effect coating and lengthening each lash. The difference between this mascara and others I have tried is that it creates almost a silicone coating on my lashes. I’m not sure I’m even doing this product justice in describing it. All I know is that is doesn’t flake off and give me dark circles under my eyes or irritate my sensitive eyes. Amazingly enough, even though it does have all-day staying power, it is surprisingly easy to take off in the evening with just some warm water. Wearing this mascara ensured that all through dinner and dancing, my eyes still looked fresh and by the end of the night, I did not look like a raccoon.
3. EcoTools Eye Enhancing Duo Brush Set
 One thing I wanted to focus on while getting glammed up for my night out was my makeup, specifically my eyes. I wanted to learn how to create a polished evening look so I began watching eye makeup tutorials to get some ideas. I learned some really great tips and techniques but I also realized that I did not have the proper makeup brushes to achieve the look I wanted. After perusing the makeup aisle I found the EcoTools Eye Enhancing Duo Brush Set. I thought to get a good makeup brush you had to pay a lot, but these were exactly what I needed and extremely affordable. The brushes were soft and held up very well after washing them. I also loved the two in one concept. With these two brushes, I was able to get four different brush head types. They were everything I needed to help me attempt to create the looks I was learning to do.
4. MAKE UP FOR EVER Step 1 Skin Equalizer Primer

My skin gets very oily and I am not a big fan of foundation, but on this night I wanted my personality to shine and not my face. I discovered MAKE UP FOR EVER Step 1 Skin Equalizer Primer thanks to the wonderful ladies at Sephora. I put a thin layer all over my face. Then I finished it off with a light dusting of loose powder and some blush. My skin felt great all night, not tight or cakey, and it truly helped to control my oil. An added bonus is that if your skin is prone to breaking out like mine is, this product does not contain Dimethicone (also known as polydimethylsiloxane or PDMS) which can make breakouts even worse.
5. Chloe + Isabel Swept Away Bracelet

No evening of glamour is complete without a little bling. I found my bling in the Chloe + Isabel Swept Away Bracelet! It was simple but had loads of sparkle and it rounded out my look perfectly. The best part is that it looked and felt expensive but it really wasn’t. The clasp was also very sturdy, so I wasn’t worried about the bracelet falling off. Best of all, Chloe + Isabel offers a Lifetime Jewelry Replacement Guarantee. Meaning that if anything happens, a stone falls off, the clasp does break or you daughter accidentally breaks it while trying it on, just call them up. They will send you a prepaid shipping label to send it back then mail you out a replacement.

It was a fantastic night out with my husband and I think we both appreciated how confident and radiant I felt that evening!
About Jessica
 Jessica is a military wife, married to her husband Nate of 14 years, and stay at home mother to three energetic and fearless children, Sophia, Brandon and Rachel. Originally from Greensburg, Pennsylvania, the military life has given her a chance to live all over the United States and meet many amazing people along the way.

Oct 13, 2017
Hey pretty! I hope you’re one of the lucky girls who finally got some fall temps this week in your neck of the woods. Two exciting things happened in my world this week. First off, our kitchen renovation is finally completed (which you may already know about if you follow GYPO on Instagram). I’ll be sharing some before and after pictures soon!
But the really exciting news is that I finally legitimately got to wear some of my outfits from the Fall 2017 GYPO Style Challenge – without breaking a sweat! Which happened just in time for round 2 of styling our 25 days of outfits from the fall capsule wardrobe. We just finished round 1 yesterday and are starting all over again in our private Facebook group today. If you didn’t get in on the first round, it’s not too late! You can join now and get all the tools you need to build your capsule wardrobe ON SALE for just $29.
Today I’m featuring a few of my favorite easy mix and match outfit formulas from the fall challenge along with the fall 2017 trends that make them special.
FYI – I’ve linked up exact or similar items in the each outfit description below. Some are unfortunately sold out.
Why I Love This: It’s a super simple outfit that’s made special by one small detail – the embroidery on the jeans. If you don’t have a pair of embroidered jeans yet, you’re going to want to add them stat!
Fall 2017 Trend: Embroidered Jeans

Why I Love This: It’s perfect as is for a lunch date with girlfriends but can also be dressed down for everyday by removing the scarf and pairing it with flats.
Fall 2017 Trends: Moto Jacket, Frayed Hem Jeans

Why I Love This: It’s such a simple and chic outfit formula that works for just about anything! The solid neutrals are kept interesting with the addition of the knotted belt. Plus this one had me at riding boots.
Fall 2017 Trends: Knotted Belt, Olive Jeans

Why I Love This: This outfit speaks to my inner preppy girl! I adore classic style and loafers. Plus mustard yellow and olive were kind of made for each other.
Fall 2017 Trends: Knotted Belt, Frayed Hem Jeans
I’d love to have you join me for round 2 of the Fall 2017 GYPO Style Challenge! We’ll be styling 25 days of mix and match outfits with the pieces above and others from the fall trends shopping list. It’s the easy and affordable way to have your own personal stylist, plus it’s now on sale for just $29! You can learn more and sign up HERE.

It’s Your Turn: Which Fall 2017 trends have turned out to be your favorites? Tell me in the comments!

Oct 11, 2017
By Jessica Pigza
How many times do you hop in the shower with little regard to the process in which you wash your hair? It all becomes quite ritualistic; wash, rinse, condition, rinse – repeat if necessary. Plus in my case, the shower is not typically a relaxing getaway where I’m free to take my time. Instead, it is a race, one where I hope in the end, I remembered to shave my legs and rinse the soap from my armpits.
Before kids, washing my hair the “right way” was not something I paid any attention to. I honestly did not even know there was such a thing as a “right way.” I had been blessed with low maintenance hair – which of course I did not appreciate at the time. Of course though, all that changed after having kids. After each child, my hair gradually became less and less resilient. The fact that I was getting older may have also been a contributing factor. Regardless, my hair was still coming out in clumps long after my post-baby shedding days should have been over and I was left with thinning hair, breakage and split ends. I realized I needed to brush up on my haircare if I wanted to save my hair. I was surprised by some of the things I was doing wrong that I could easily change. With just a few small changes I noticed a big difference. Below are five things I did to stop hurting my hair.
1. Do Not Use Super Hot Water
I lived by the mantra, the hotter the better. No matter how long or short my shower was, it was at least going to be hot! As much as I loved feeling the hot water wash over my tired body, I didn’t realize how much it was hurting my hair. Washing with water that is too hot will actually dry out your hair and scalp. This can lead to a very itchy scalp and breakage. Instead, use warm water before applying shampoo to help open up hair cuticles. This will allow the shampoo and conditioner to work better. Then, when it comes time to rinse out the conditioner, turn the water temp way down. By rinsing out the conditioner with cool water, it will cause the cuticles to contract again, making hair less vulnerable, and locking in the conditioner. This will leave hair feeling softer and reduce frizz.
2. Properly Prep for Shampoo and Conditioner
In order for shampoo to work effectively, hair needs to be completely saturated before applying in order to work up a good lather. For conditioner, however, it is the opposite. After thoroughly rinsing out all the shampoo, gently squeeze as much water out of your hair as possible before applying conditioner. Doing this will purge the water from your hair and allow the conditioner to penetrate deeper into the strands. Learning this probably had the biggest impact on my hair. My conditioner was finally able to soak into each strand and help repair it, rather than just sitting on the surface, only to be quickly rinsed away.
Hint: After applying your conditioner don’t be in a hurry to rinse it out. Let it sit on your strands while you finish up the rest of your shower, then rinse. This will give it more time to hydrate and repair your hair.
3. Massage Instead of Scrub
Do not scrub! I repeat, do NOT scrub, especially with your nails. If it has been more than a few days between washings, you may have the urge to really get after it and scrub your scalp clean. Instead of scrubbing it clean, you are scrubbing it raw, breaking open your skin and causing some major irritation. In some cases, it may even cause bleeding. Instead, use your fingertips and gently massage your scalp. Not only will this help keep your scalp clean and healthy, but it will also help stimulate growth. Remember, healthy hair starts at the scalp!
Hint: Before you jump in the shower, run a brush through your hair. Not only will this help loosen up dirt and oil, but it will also pull out any loose strands and keep them from going down the drain. Brushing through any knots or tangles while your hair is still dry is also better for your locks because hair is very fragile when it is wet.
4. Don’t Give Hair the All-Over Treatment
For many years I used the “slap it on and rinse it off” system for washing my hair. I never realized there was actually a method to how shampoo and conditioner should be applied. Since the purpose of shampoo is to cleanse hair, it should be focused on the roots because they are typically the dirtiest, be it oil, dry shampoo or other product build up. Gently massage the majority of the shampoo into the scalp then work it down towards the ends. Do not spend as much time or use as much shampoo on the ends of your hair. The ends are not as dirty and since they are the oldest part of each strand, they tend to dry out easier. Conditioner, on the other hand, is meant to help hydrate and repair hair, so now the focus should be on the ends. Never use conditioner on the scalp as it will make it even oilier. Start applying conditioner about halfway down the hair shaft and work it in until you have reached the tips.
5. Dial Down the Towel Drying
We all hate drying our hair but using a towel and rubbing like a maniac is only going to give you a tangled, frizzy mess. Too much friction against your hair will lead to breakage and tear out your strands. Instead, gently squeeze as much water out of your hair as you can. Gently brush your hair, then squeeze again. Be sure not to twist or wring your hair out as this will also more cause damage. I have long locks and to help cut down on drying time I use a microfiber towel. (This was the only thing I was doing right by my hair and I didn’t even know it!) I have the Aquis Essentials Microfiber Towel and it is amazing! Not only does it suck water away from my hair and reduce split ends, but I’ve had mine for 16 years! It is safe to say I’ve gotten my money’s worth out of it. My daughters have since started stealing, I mean borrowing my towel, so it might finally be time to invest in another one.
Aquis Essential Waffle Luxe Hair Towel
About Jessica
Jessica is a military wife, married to her husband Nate of 14 years, and stay at home mother to three energetic and fearless children, Sophia, Brandon and Rachel. Originally from Greensburg, Pennsylvania, the military life has given her a chance to live all over the United States and meet many amazing people along the way.
Getting my pretty on with Style Elixir, Jo Lynne Shane, and A Little Bit of Everything.
I Feel Pretty Link Up
It’s the day of the week at GYPO where we celebrate what makes us feel pretty. Whether it’s a new outfit, hairstyle, or makeup, the I Feel Pretty link up is about anything and everything that makes your life prettier. Even if you’re not a blogger, you can still play along. Just tell me what made you feel pretty this week in the comments.
2. Link up your pretty post.
3. Link back to GYPO.
4. Visit other pretties.


